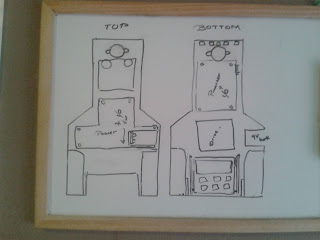
I recently came across one of my old drawings from high-school of a buggy that I had wanted to build but never got around do it. So I decided to collect up some of bits and bobs and put together a very rudimentary buggy just to make my lock-down weekend a little bit exciting.
From what I remember from when I was drawing this I wanted a bunch of features on it, like;
- Pull out control panel
- Automatic docking for charging
- Use as balance-bot and
- Line following
To get started with what I can do with what I have, I started by building the base car with remote control features.
Luckily, I found a buggy shell and some generic yellow motors in my parts box. So I connect the motors up with four H-bridges with two L298N boards and powered it up with two 9V batteries in parallel (as my batteries are pretty old and do not have my capacity remaining). Next using a buck converter I dropped my 9V battery voltage to 5V and connected it up to NodeMCU (ESP8266) which will act as the dedicated drive controller.
Once I have tested that all motors are working, I looked around on the web to find an easy implementation of a remote control and came across a project by Lacour Vincent (His GitHub). Vincent has implemented a WiFi remote with a phone app. Since the app is available on Google Play I downloaded it and got cracking with the code with some help from Vincents' code.
My code for this implementation of the car can be found on GitHub here
Although the buggy successfully worked, I am not able to show you a video or demonstration of it because my batteries only last for a good 20 to 40 seconds when running all 4 motors at once. But overall, very happy with the outcome of this one-day build.


No comments:
Post a Comment